

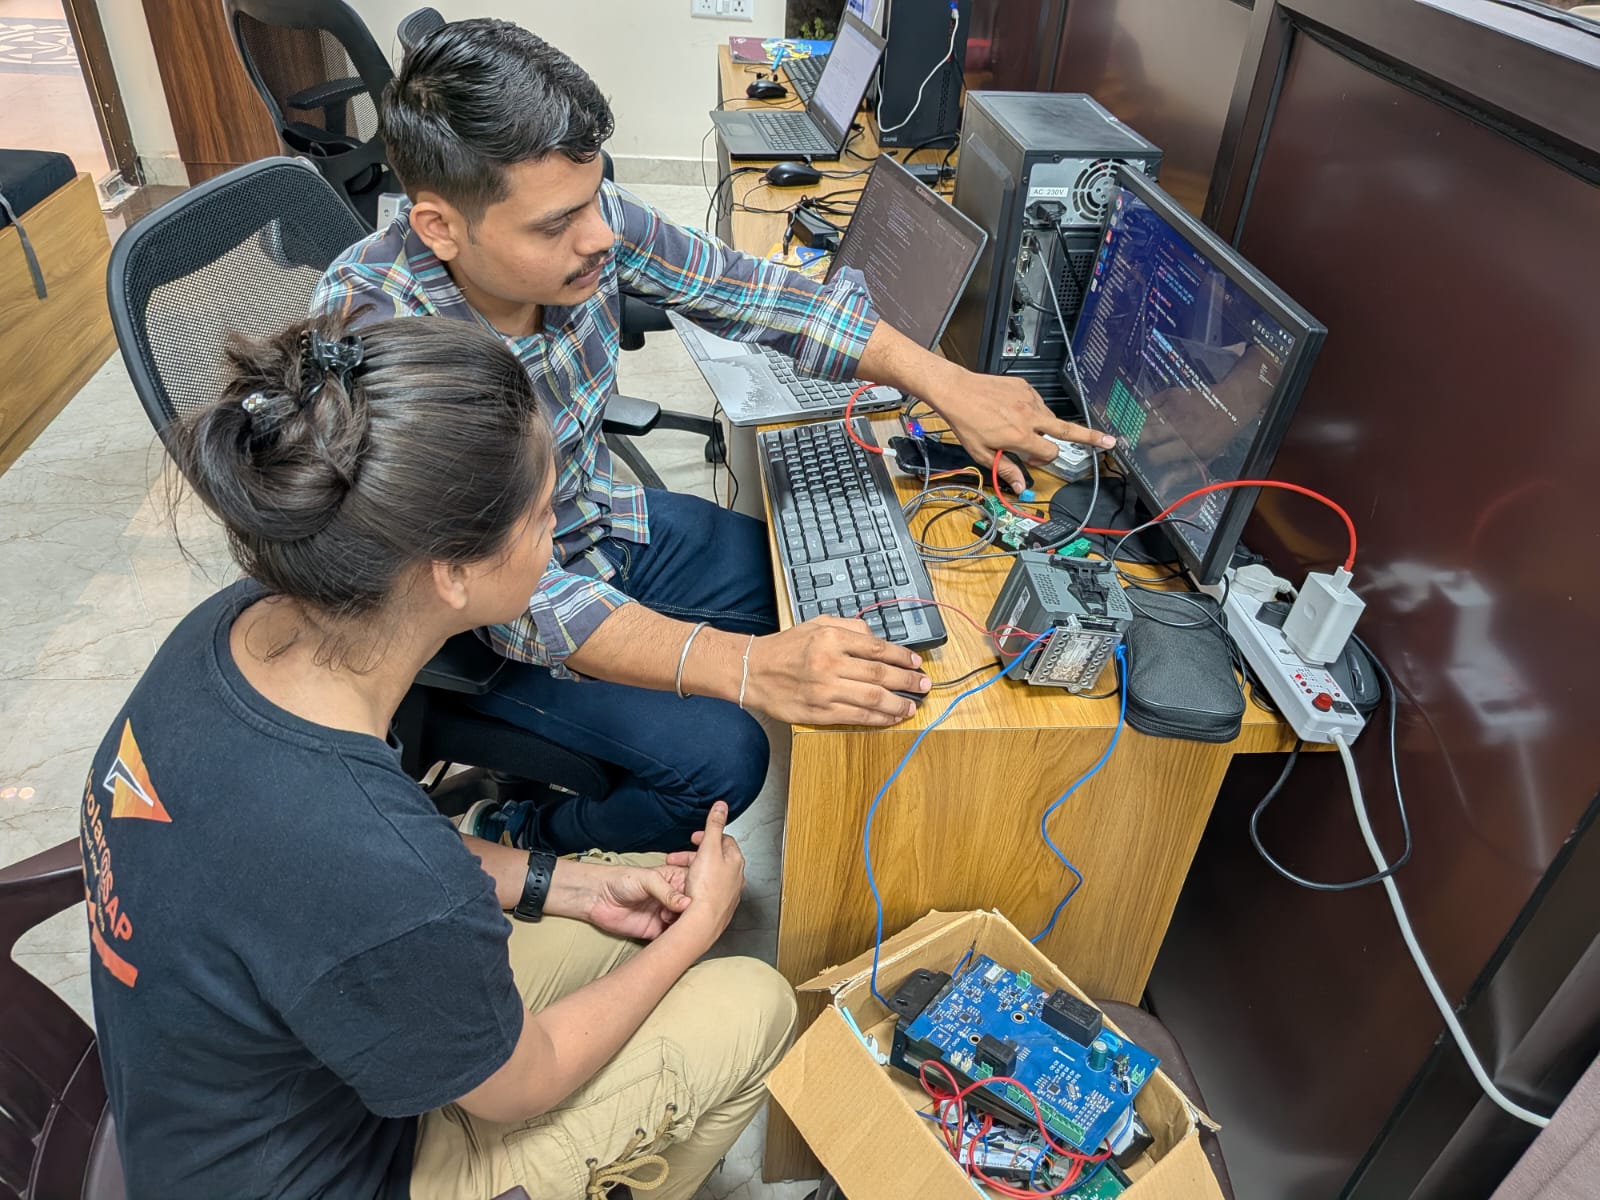
There is a moment that almost every robotics engineer describes when asked about how they got started. They built something that moved. Not something impressive. Not something complex. Just something that responded to the world around it in a way that felt alive, and that moment changed how they thought about what was possible.
For most of them, that moment happened with something simple. A small wheeled robot that followed a line on the floor. A robotic arm that picked up an object. A device that turned on a light when it detected movement. The complexity came later. The curiosity that drove everything else came from that first moment of watching something they built actually do something.
This guide is about getting to that moment. It covers what robotics actually involves, what you need to get started, and how to build your first real robot using accessible, affordable components that any student can get in India today.
What Robotics Engineering Actually Is
Robotics engineering is the discipline of designing, building, programming, and maintaining robots, which are machines that can perform tasks automatically or semi-automatically in response to their environment.
A robot, in the engineering sense, is not just a humanoid machine from science fiction. It is any system that combines mechanical structure, electrical components, sensors that perceive the environment, actuators that act on the environment, and software that ties all of these together into coordinated behavior.
A robotic arm on a car assembly line is a robot. A drone that adjusts its flight path in response to wind is a robot. A warehouse system that moves shelves to the correct picking location is a robot. An autonomous vehicle is a robot. The form varies enormously, but the underlying engineering discipline that designs and builds all of these systems is robotics.
What makes robotics genuinely interdisciplinary is that building a real robot requires knowledge from mechanical engineering, electrical engineering, computer science, and increasingly artificial intelligence. This breadth is what makes it challenging and what makes it interesting to people who enjoy working across multiple technical domains simultaneously.
Why Robotics Is Growing So Fast in India
India’s manufacturing sector is undergoing a significant modernization push, and automation is central to that modernization. Automotive companies including Maruti Suzuki, Tata Motors, and Mahindra have deployed robotic assembly systems at scale. Electronics manufacturing facilities are adopting robotic handling and inspection systems. Pharmaceutical companies use robotic systems for sterile filling and packaging operations.
Beyond manufacturing, robotics is expanding into agriculture, where drone-based crop monitoring and automated irrigation systems are being deployed across Indian farms. Healthcare is seeing growing adoption of robotic surgical systems and rehabilitation robots. Logistics companies including Delhivery and Blue Dart are exploring warehouse automation that reduces dependence on manual sorting and handling.
The Indian government’s push toward defense manufacturing and space exploration through ISRO has created additional demand for robotics engineering expertise in domains where precision and reliability requirements are extremely high.
This combination of industrial modernization, new application domains, and government investment is creating demand for robotics engineers at every level, from technicians who maintain existing systems to engineers who design new ones.
What You Need to Get Started: The Essential Components
One of the most common misconceptions about robotics is that it requires expensive, specialized equipment to begin learning. A genuinely useful first robot can be built with components costing between two thousand and five thousand rupees that are available from online retailers across India.
The microcontroller is the brain of most beginner robots. It is the component that runs your program, reads sensor data, and controls actuators. Arduino is by far the most widely used microcontroller platform for learning robotics, and it is the right starting point for almost every beginner. Arduino boards are available from multiple Indian retailers and cost between three hundred and eight hundred rupees depending on the model.
Motors are the components that create movement. DC motors are the simplest and most commonly used for wheeled robots. Servo motors provide precise angular control and are used for robotic arms and other applications requiring accurate positioning. Stepper motors provide even more precise control and are used in applications like 3D printers. For a first wheeled robot, small DC motors with gear reduction are the most appropriate and affordable choice.
A motor driver is necessary because the Arduino cannot directly power motors, which require more current than the microcontroller can safely provide. The L298N motor driver module, available for around one hundred to two hundred rupees, is the standard beginner choice and can control two DC motors independently.
Sensors allow the robot to perceive its environment. For a line-following robot, infrared sensors detect the contrast between a dark line and a light surface. For an obstacle-avoiding robot, ultrasonic sensors measure distance to objects. For more sophisticated applications, cameras, accelerometers, gyroscopes, and other sensors provide richer environmental information. A basic starter set of infrared and ultrasonic sensors costs around three hundred to five hundred rupees.
A chassis provides the mechanical structure that holds everything together. Ready-made two-wheeled or four-wheeled robot chassis kits are available from Indian electronics retailers for five hundred to one thousand rupees and include motors, wheels, and a mounting plate. This is significantly easier for a first project than designing and fabricating a custom chassis.
A power supply, typically four AA batteries or a lithium polymer battery pack, powers the entire system. Understanding how to manage power distribution to the different components is a practical skill that every robotics student needs to develop.
Component Summary Table
Component, Purpose, Recommended Beginner Choice, Approximate Cost in India
Microcontroller, Brain of the robot, runs the program, Arduino Uno or Nano, 300 to 800 rupees
Motor Driver, Controls motors safely from microcontroller, L298N module, 100 to 200 rupees
DC Motors with Gearbox, Creates movement, N20 or TT gear motors, 200 to 400 rupees
Robot Chassis Kit, Mechanical structure, 2-wheel or 4-wheel kit with motors, 500 to 1000 rupees
Ultrasonic Sensor, Measures distance to obstacles, HC-SR04, 50 to 100 rupees
Infrared Sensors, Detects line contrast for line following, IR sensor module pair, 100 to 200 rupees
Jumper Wires, Connects components, Male to male and male to female sets, 100 to 150 rupees
Breadboard, Prototyping connections without soldering, Standard 830 point breadboard, 80 to 150 rupees
Battery Pack, Powers the system, 4 AA battery holder or LiPo pack, 100 to 300 rupees
Total Estimated Cost, Complete beginner robot kit, All components above, 1500 to 3300 rupees
Setting Up Arduino: Your First Steps
Arduino programming uses a simplified version of C++ that is accessible to beginners while being capable enough for sophisticated robotics applications. The Arduino IDE, which is free software available for Windows, Linux, and macOS, provides everything needed to write, compile, and upload programs to an Arduino board.
The first program every Arduino student writes is Blink, which makes the built-in LED on the Arduino board turn on and off repeatedly. This simple program confirms that the development environment is set up correctly and that the board is responding to uploaded code.
void setup() {
  pinMode(LED_BUILTIN, OUTPUT);
}

void loop() {
  digitalWrite(LED_BUILTIN, HIGH);
  delay(1000);
  digitalWrite(LED_BUILTIN, LOW);
  delay(1000);
}
Understanding this program requires understanding two fundamental concepts that appear in every Arduino program. The setup function runs once when the board powers on and is used to initialize components and configure pins. The loop function runs continuously after setup completes and contains the main logic of the program. This setup and loop structure is the foundation of how every Arduino program works, regardless of complexity.
Project One: Obstacle Avoiding Robot
An obstacle avoiding robot uses an ultrasonic distance sensor to detect objects in its path and changes direction when an obstacle is detected. This is one of the most satisfying first projects because the robot appears to navigate its environment independently, which is exactly the kind of behavior that makes robotics feel genuinely exciting.
The ultrasonic sensor works by emitting a brief pulse of ultrasonic sound and measuring how long it takes for the echo to return. Since sound travels at a known speed, the time measurement can be converted directly into a distance measurement. Objects closer than a threshold distance trigger the robot to stop and turn before continuing forward.
const int TRIG_PIN = 9;
const int ECHO_PIN = 10;
const int LEFT_MOTOR_FORWARD = 2;
const int LEFT_MOTOR_BACKWARD = 3;
const int RIGHT_MOTOR_FORWARD = 4;
const int RIGHT_MOTOR_BACKWARD = 5;
const int SPEED_PIN_LEFT = 6;
const int SPEED_PIN_RIGHT = 7;

void setup() {
  pinMode(TRIG_PIN, OUTPUT);
  pinMode(ECHO_PIN, INPUT);
  pinMode(LEFT_MOTOR_FORWARD, OUTPUT);
  pinMode(LEFT_MOTOR_BACKWARD, OUTPUT);
  pinMode(RIGHT_MOTOR_FORWARD, OUTPUT);
  pinMode(RIGHT_MOTOR_BACKWARD, OUTPUT);
  Serial.begin(9600);
}

long measureDistance() {
  digitalWrite(TRIG_PIN, LOW);
  delayMicroseconds(2);
  digitalWrite(TRIG_PIN, HIGH);
  delayMicroseconds(10);
  digitalWrite(TRIG_PIN, LOW);
  long duration = pulseIn(ECHO_PIN, HIGH);
  return duration * 0.034 / 2;
}

void moveForward(int speed) {
  analogWrite(SPEED_PIN_LEFT, speed);
  analogWrite(SPEED_PIN_RIGHT, speed);
  digitalWrite(LEFT_MOTOR_FORWARD, HIGH);
  digitalWrite(LEFT_MOTOR_BACKWARD, LOW);
  digitalWrite(RIGHT_MOTOR_FORWARD, HIGH);
  digitalWrite(RIGHT_MOTOR_BACKWARD, LOW);
}

void turnRight(int speed) {
  analogWrite(SPEED_PIN_LEFT, speed);
  analogWrite(SPEED_PIN_RIGHT, speed);
  digitalWrite(LEFT_MOTOR_FORWARD, HIGH);
  digitalWrite(LEFT_MOTOR_BACKWARD, LOW);
  digitalWrite(RIGHT_MOTOR_FORWARD, LOW);
  digitalWrite(RIGHT_MOTOR_BACKWARD, HIGH);
}

void stopMotors() {
  digitalWrite(LEFT_MOTOR_FORWARD, LOW);
  digitalWrite(LEFT_MOTOR_BACKWARD, LOW);
  digitalWrite(RIGHT_MOTOR_FORWARD, LOW);
  digitalWrite(RIGHT_MOTOR_BACKWARD, LOW);
}

void loop() {
  long distance = measureDistance();
  Serial.print("Distance: ");
  Serial.print(distance);
  Serial.println(" cm");

  if (distance < 20) {
    stopMotors();
    delay(500);
    turnRight(150);
    delay(600);
  } else {
    moveForward(180);
  }
}
Building this project and watching the robot navigate around obstacles for the first time is the moment most students describe as when robotics became real to them rather than theoretical.
Project Two: Line Following Robot
A line following robot uses infrared sensors to detect a dark line on a light surface and adjusts its motor speeds to stay on the line. This project introduces the concept of feedback control, where the robot continuously measures its position relative to the line and adjusts its behavior based on that measurement.
The two infrared sensors are placed at the front of the robot, one on the left and one on the right of the line. When both sensors see the line, the robot moves straight. When the left sensor goes off the line, the robot turns left. When the right sensor goes off the line, the robot turns right.
const int LEFT_SENSOR = A0;
const int RIGHT_SENSOR = A1;
const int LEFT_MOTOR_FORWARD = 2;
const int LEFT_MOTOR_BACKWARD = 3;
const int RIGHT_MOTOR_FORWARD = 4;
const int RIGHT_MOTOR_BACKWARD = 5;
const int SENSOR_THRESHOLD = 500;

void setup() {
  pinMode(LEFT_MOTOR_FORWARD, OUTPUT);
  pinMode(LEFT_MOTOR_BACKWARD, OUTPUT);
  pinMode(RIGHT_MOTOR_FORWARD, OUTPUT);
  pinMode(RIGHT_MOTOR_BACKWARD, OUTPUT);
  Serial.begin(9600);
}

void loop() {
  int leftSensor = analogRead(LEFT_SENSOR);
  int rightSensor = analogRead(RIGHT_SENSOR);

  bool leftOnLine = leftSensor < SENSOR_THRESHOLD;
  bool rightOnLine = rightSensor < SENSOR_THRESHOLD;

  if (leftOnLine && rightOnLine) {
    digitalWrite(LEFT_MOTOR_FORWARD, HIGH);
    digitalWrite(LEFT_MOTOR_BACKWARD, LOW);
    digitalWrite(RIGHT_MOTOR_FORWARD, HIGH);
    digitalWrite(RIGHT_MOTOR_BACKWARD, LOW);
  }
  else if (!leftOnLine && rightOnLine) {
    digitalWrite(LEFT_MOTOR_FORWARD, HIGH);
    digitalWrite(LEFT_MOTOR_BACKWARD, LOW);
    digitalWrite(RIGHT_MOTOR_FORWARD, LOW);
    digitalWrite(RIGHT_MOTOR_BACKWARD, LOW);
  }
  else if (leftOnLine && !rightOnLine) {
    digitalWrite(LEFT_MOTOR_FORWARD, LOW);
    digitalWrite(LEFT_MOTOR_BACKWARD, LOW);
    digitalWrite(RIGHT_MOTOR_FORWARD, HIGH);
    digitalWrite(RIGHT_MOTOR_BACKWARD, LOW);
  }
  else {
    digitalWrite(LEFT_MOTOR_FORWARD, LOW);
    digitalWrite(LEFT_MOTOR_BACKWARD, LOW);
    digitalWrite(RIGHT_MOTOR_FORWARD, LOW);
    digitalWrite(RIGHT_MOTOR_BACKWARD, LOW);
  }
}
This project introduces sensor calibration, which is the practical reality that sensor readings are affected by ambient light conditions and surface reflectivity and need to be adjusted for the specific environment where the robot will operate. Learning to calibrate sensors is one of the practical skills that distinguishes students who have built real systems from those who have only worked with simulated environments.
Beyond Arduino: The Next Steps in Robotics
Arduino is an excellent starting point, but serious robotics work involves additional platforms and concepts that build on the foundation it provides.
Raspberry Pi is a single-board computer that runs a full Linux operating system and is used for robotics applications that require more computational power than Arduino provides, including computer vision, machine learning inference, and complex navigation algorithms. Understanding how to combine Arduino for low-level hardware control with Raspberry Pi for high-level processing is a practical skill used in many real robotics systems.
ROS, the Robot Operating System, is not actually an operating system but a framework for developing robot software. It provides tools and libraries for building complex robot applications including message passing between software components, simulation, visualization, and a large library of existing implementations for common robotics tasks. ROS is the standard framework used in professional and research robotics, and understanding it is increasingly expected for serious robotics engineering roles.
Computer vision, enabled by cameras and image processing libraries like OpenCV, allows robots to perceive and respond to visual information. Object detection, line following using cameras instead of infrared sensors, and face tracking are all applications that combine robotics hardware with computer vision software.
PID control, which stands for Proportional-Integral-Derivative control, is a mathematical control algorithm used in almost every real robotic system to make actuators respond smoothly and precisely to sensor feedback rather than with the on-off behavior of simple threshold based control. Understanding PID control is one of the concepts that marks the transition from beginner to intermediate robotics work.
A complete guide on AI that covers the machine learning and computer vision concepts most relevant to advanced robotics applications is available here: https://www.tuxacademy.org/what-is-artificial-intelligence-simple-explanation-for-beginners/
Robotics and AI: The Intersection That Is Changing the Field
The most significant development in robotics over the last five years has been the increasing integration of artificial intelligence, particularly computer vision and reinforcement learning, into robotic systems.
Traditional robotic systems follow explicit programmed rules. Pick up the object when the sensor detects it at this location. Follow the line based on sensor readings. These rule-based systems work well in controlled, predictable environments but struggle when the environment changes in ways that were not anticipated when the rules were written.
AI-powered robotic systems learn from experience rather than following fixed rules. A robotic arm trained with reinforcement learning can learn to grasp objects of different shapes and sizes by trying different approaches and improving based on which attempts succeeded. A navigation system trained on camera images can learn to navigate complex, changing environments without explicit programming for every possible situation.
For robotics students in India, understanding both the hardware fundamentals covered in this guide and the AI concepts being applied to advanced robotics systems provides a particularly strong foundation for the direction the field is moving.
A guide on neural networks in Python that provides the foundational understanding of how the AI components in advanced robotic systems work is available here: https://www.tuxacademy.org/neural-network-in-python-course/
Robotics Career Paths and Salary Ranges in India
Robotics engineering in India spans several career paths with different entry requirements and compensation levels.
Role, Experience Level, Salary Range, Key Skills
Robotics Technician, Fresher, 3 to 6 LPA, Arduino, basic electronics, maintenance
Robotics Engineer, Junior 1 to 3 years, 6 to 14 LPA, ROS, Python, C++, sensor integration
Automation Engineer, Mid Level 3 to 6 years, 14 to 28 LPA, PLC, industrial robots, Python
AI Robotics Engineer, Mid Level 3 to 6 years, 18 to 35 LPA, ROS, Python, computer vision, ML
Robotics Architect, Senior 6 plus years, 30 to 60 LPA, System design, team leadership, AI integration
Defense/Space Robotics, Mid to Senior, 15 to 45 LPA, Specialized systems, security clearance
Image/Diagram Suggestions for This Blog
Add these images in WordPress for better SEO and user engagement:
Image 1: Arduino Uno board labeled diagram showing major components. Alt text: Arduino Uno microcontroller board labeled diagram for beginners.
Image 2: Circuit diagram showing Arduino connected to L298N motor driver and DC motors. Alt text: Arduino motor driver circuit diagram for beginner robot.
Image 3: Ultrasonic sensor HC-SR04 wiring diagram connected to Arduino. Alt text: HC-SR04 ultrasonic sensor Arduino wiring diagram.
Image 4: Completed two-wheel robot chassis with components labeled. Alt text: Beginner Arduino robot chassis with motors sensors and controller labeled.
Image 5: ROS architecture diagram showing how components communicate. Alt text: ROS Robot Operating System architecture diagram for beginners.
Common Mistakes Robotics Beginners Make
Connecting motors directly to the Arduino without a motor driver is the single most common hardware mistake beginners make, and it can permanently damage the Arduino board. Motors draw significantly more current than the Arduino can safely supply, and a motor driver is always required between the two.
Skipping the serial monitor during development makes debugging significantly harder. The Arduino serial monitor allows you to print sensor values and program state to a connected computer, which is the most effective way to understand what the program is doing and why the robot is not behaving as expected.
Not securing connections properly during testing leads to intermittent failures that are difficult to diagnose. A loose jumper wire that connects and disconnects as the robot moves produces behavior that looks like a software bug but is actually a hardware problem. Taking time to secure connections properly before testing saves significant debugging time.
Jumping to complex projects before building comfort with individual components is a common enthusiasm-driven mistake. Building the obstacle avoiding and line following projects covered in this guide before attempting more ambitious projects produces much better results than trying to build a complex system before the fundamentals are solid.
Frequently Asked Questions
How much does it cost to start learning robotics in India?
A complete beginner kit including an Arduino Uno, motor driver, chassis with motors, sensors, and connecting components costs between 1,500 and 3,500 rupees from online retailers including Robu.in, RoboElements, and Amazon India. This is sufficient to build the obstacle avoiding and line following projects covered in this guide.
Do I need to know programming before starting robotics?
Basic programming knowledge is helpful but not strictly required. Arduino programming is genuinely accessible to complete beginners because the language is simpler than most general purpose programming languages and the immediate physical feedback makes it easier to understand what programs are doing. Students who start robotics without programming experience typically develop programming skills naturally through the process of building projects.
Is robotics a good career in India?
Robotics is a growing field in India with genuine career opportunities across manufacturing, defense, agriculture, healthcare, and logistics. It is not yet as large as software development in terms of absolute job numbers, but the growth trajectory is strong and the specialization commands good compensation relative to the level of experience. Students who combine robotics hardware skills with software, AI, and computer vision knowledge are particularly well positioned.
What is the difference between Arduino and Raspberry Pi for robotics?
Arduino is a microcontroller that runs a single program directly, is excellent for real-time hardware control, and has very limited computing power. Raspberry Pi is a single-board computer that runs Linux, can run multiple programs simultaneously, supports camera and network connectivity, and has significantly more computing power but is less suited to the precise timing requirements of direct hardware control. Most sophisticated robotics systems use both, with Arduino handling low-level hardware control and Raspberry Pi handling high-level processing.
Can I learn robotics online without a physical kit?
Simulation environments including Gazebo and Webots allow robot programs to be tested in virtual environments without physical hardware. These are useful for learning ROS and algorithm development. However, building physical systems is important for developing the practical hardware skills that real robotics work requires, and simulation alone does not adequately prepare students for the challenges of physical system integration.
Final Thought
Robotics is one of the few engineering disciplines where progress is immediately visible and physically real. When the obstacle avoiding robot you built detects an obstacle and turns away, the feedback is instant and concrete. When the line follower stays on track, the control algorithm that seemed abstract in theory suddenly makes physical sense.
This directness of feedback is what makes robotics one of the most effective ways to build genuine engineering intuition alongside technical knowledge. The students who progress furthest in robotics are not necessarily the ones who understand everything theoretically before building. They are the ones who build things, see what happens, understand why, and build the next thing.
Start with the components. Write the first program. Watch the robot move. Everything else follows from there.
A complete guide on Python programming that directly supports the higher level robotics programming covered in advanced ROS-based development is available here: https://www.tuxacademy.org/python-full-course-roadmap-for-beginners/
For students interested in how AI and machine learning connect to advanced robotics applications, this guide provides essential background: https://www.tuxacademy.org/what-is-ai-hallucination-why-it-happens/
Call to Action
Start your robotics engineering journey with hands-on training that goes from Arduino fundamentals to advanced AI-integrated robotic systems.
TuxAcademy offers structured robotics courses covering hardware fundamentals, Arduino programming, Python, AI integration, and career preparation with industry experienced trainers and real project work. Students who complete the program leave with working robotic systems they built themselves and the knowledge to explain every design decision in a technical interview.
Website: https://www.tuxacademy.org/
Email: info@tuxacademy.org
Phone: +91-7982029314
Visit our Greater Noida West center for a free demo session and see what hands-on robotics learning actually looks like.
Our Location
Students searching for a robotics course in Greater Noida or Arduino and embedded systems training near Knowledge Park will find TuxAcademy directly accessible from across the NCR region.
TuxAcademy is within easy reach of students at Sharda University, Galgotias University, Bennett University, Noida International University, and GL Bajaj Institute of Technology and Management, all of which are within comfortable commuting distance from our Greater Noida West center. The institute is also easily accessible from Gaur City, Techzone 4 Greater Noida West, Cherry County Greater Noida West, Eco Village 1 Greater Noida West, Sector 16B Greater Noida West, Bisrakh, and Crossings Republik.
Knowledge Park Metro Station and the Noida Greater Noida Expressway provide strong connectivity for students coming from Noida, Delhi, and across the NCR region.
TuxAcademy is a preferred destination for students seeking practical, job oriented training in Robotics Engineering, Arduino Programming, Python, Artificial Intelligence, Data Science, and Automation across Greater Noida West and NCR.